How to install JOOMLA on Windows 2003 Server using IIS to run website(s)
STEP #1
How to Install PHP 5
This tutorial assumes that you have IIS installed on a Windows XP Pro or Windows server 2003. If not, you must install IIS on the server.
Note: See tutorial on how to install IIS
1. Install the BINARY package (copy the files. Not an executable). The executable messes up too often.
2. Go to the C:\ drive and create a new folder named php and unzip all contents from the zip file into the C: \php folder you just created. Minimize if
you like for now.
3. Go into the Windows directory, c:\windows and copy FROM the php folder, the document “php.ini-recommended”.
4. Rename the php.ini-recommended document to php.ini
5. Go to C:\Windows\system32
6. From the php directory, copy the file php5.ts.dll into C:\Windows\system32.
7. You may close any windows you have opened, we won’t need anything else.
8. Open IIS
9. Expand the list and RIGHT click on the Web Sites folder.
10. Click Properties
11. Click the Home Directory tab
12. Click the Configuration tab
13. Click the ADD button
14. Click the Browse button
15. Browse to the php folder in your C:\ directory
16. Find the php5isapi.dll file and select it (Do not close the box yet)
17. In the empty extension box, manually type in “.php” without the quotes
18. Click the OK button leaving all other defaults
19. Click the OK button again
20. Click on the Documents tab
21. Click the ADD button
22. Type in the empty box “index.php” without the quotes
23. Click the OK button
Note: We are adding the index.php into the list of default pages because Joomla has php pages and not html pages. Move the index.php UP the list to make
it the first one.
24. With IIS still open, click once on the Web Service Extensions folder in the list
25. Now RIGHT click on the Web Service Extensions folder
26. Select “Add new web service extension” and a new box opens up
27. In the top empty box, type in “PHP” without the quotes
28. Click the Add button
29. Click the Browse button
30. Browse to your C:\php folder
31. Select the phpisapi.dll file
32. Click the ok button
33. Put a check in the “Set Extension Status to Allow”
34. Click the ok button
Note: You should now see PHP in with a green circle and white checkmark in the service extensions list.
35. You can close IIS now; you are done with installing PHP on your server.
BELOW IS HOW TO TEST PHP TO MAKE SURE THAT IT IS WORKING
1. Go into the “wwwroot” folder located c:\inetpub\wwwroot
2. Create a new text document
3. Type into the text document (EXACTLY as below) and this will give us an information page.
<?php
Phpinfo();
?>
4. Now save the document, File > save as> index.php (remember, we made index.php our default webpage in step 22.
5. Open a browser and type in http://localhost and a php information page should now be showing. When you see the php information page it tells us that
php is installed and working perfectly.
If you did not make the index.php the default webpage in IIS, you must type in your page like this http://localhost/index.php
STEP #2
How to Install MySQL Server
1.Download MYSQL SOFTWARE, mysql-essential-5.0.77-win32.msi
2.Download MYSQL GUI-TOOLS SOFTWARE, mysql-gui-tools-5.0-r17-win32.msi
3.Double click to install the mysql-essential-5.0..77-win32.msi
4.Choose COMPLETE install
5.Configure now, click next
6.Detailed Configuration, click next
7.Choose SERVER MACHINE, click next
8.Choose MULTIFUNCTIONAL DATABASE
9.All the defaults on the installation path is fine, click next
10.Leave the DSS (Decision support) checked if you don't need more than 20 concurrent connections (checked by default), I chose MANUAL SETTING and
selected 100 concurrent connections, next
11.Leave the TCP and Enable strict mode checked.
12.Port 3306 MUST be put in your windows firewall and /or router to allow that port through to your website.
13.Leave standard character set checked
14.Put a checkmark in Install as Windows Service, Launch mysql server automatically and Include Bin boxes. Server Name: MySql
15.Leave Modify Security Settings checked and create a password (this is for the root database login).
16.DO NOT CHECK enable root access from remote machines
17.Click Next
18.Click Execute
19.Finish
20.Install the GUITOOLS
21.Click next all the way through the screens, all the defaults are fine.
22.Open the GUITOOL program (MySql Administrator)
23.The box opens and you enter in the password that you put in on the MySql install.
Server host: localhost
Username: root
Password: The password you created on the MySql install
My SQL Administrator program
Server Host: localhost
username:root
Password:XXXXX
Port.3306
24.Click OK and the database opens
How to Install Joomla on Windows 2003
1. Make sure IIS is installed first (see other tutorial)
2. Open the php.ini file (You may open RUN, and then type in php.ini and the document should come up). You may have to have Windows WORDPAD associated to view it properly.
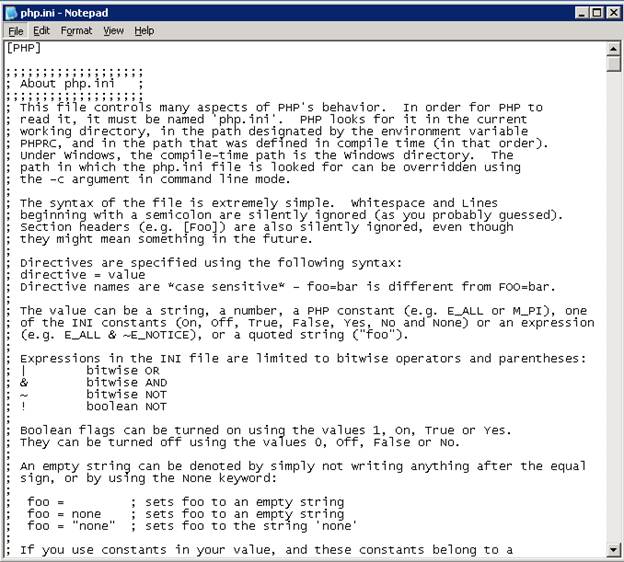 |
Note:
Once you have the php.ini open, you can "find" what we need to change.
With the php.ini file open, go to EDIT and scroll to FIND. A box pops up
and just type in what we need to change.
So the first one we need to find is magic_quotes. We need to turn it
"on".
magic_quotes_gpc = off (THIS IS THE DEFAULT, WE NEED TO CHANGE THIS TO
ON)
; Magic quotes for incoming GET/POST/Cookie data.
magic_quotes_gpc = on
 |
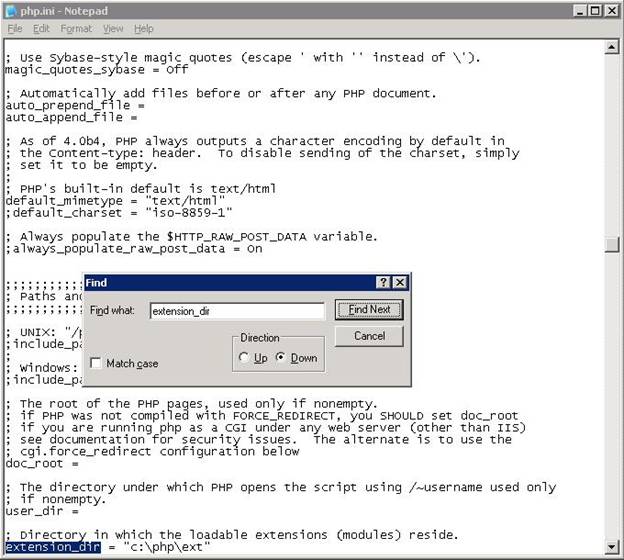
NEXT:
Directory in which the loadable extensions (modules) reside.
extension_dir = "./" (THIS IS THE DEFAULT, WE NEED TO CHANGE THE PATH)
; Directory in which the loadable extensions (modules) reside. (CHANGE
THE PATH)
extension_dir = "c:\php\ext (CHANGE TO THIS PATH, EXAMPLE BELOW)
 |
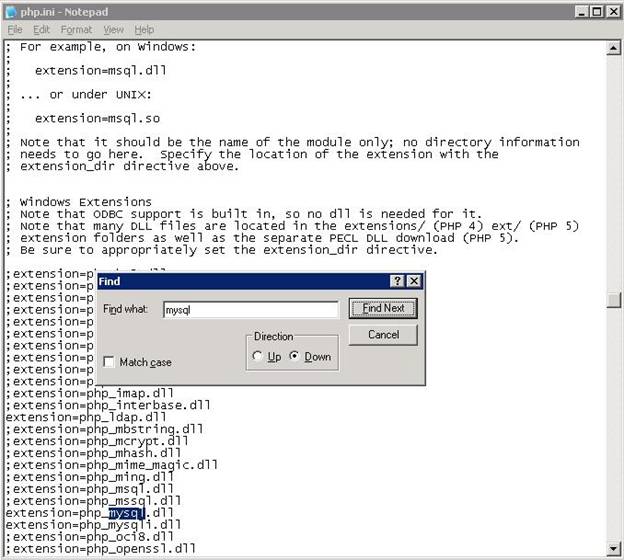
We need to UNCOMMET the two lines below
extension=php_mysql.dll
extension=php_mysqli.dll
 |
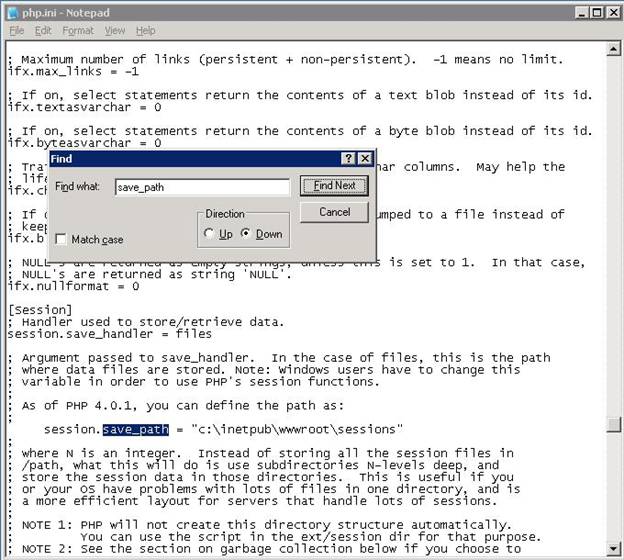
NEXT:
We need to uncomment and edit the save_path to a path we will want to
SAVE our SESSIONS.
I have chosen: session.save_path = "c:\inetpub\wwwroot\sessions"
We will create this folder shortly, for now, go ahead and type in this
path.
 |
NEXT:
We need to create the sessions folder for the path that we just created
above.
Go to the path; c:\inetpub\wwwroot
Now, create a new folder and name it "sessions."
You will see many files in my wwwroot folder; you may not have those
files. These are my Joomla files also. I am writing this tutorial after
I successfully completed getting my Joomla website to work
 |
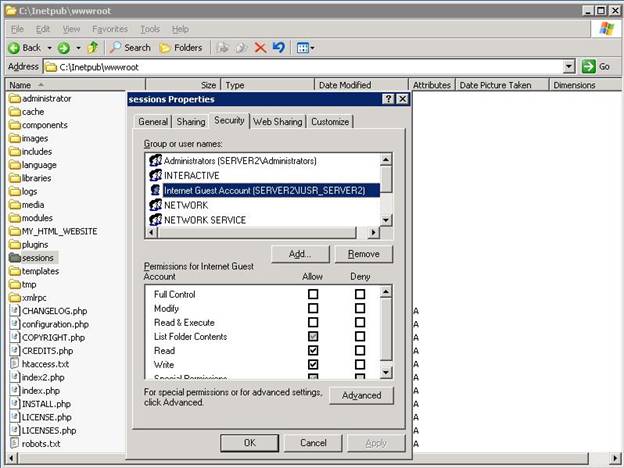
IMPORTANT: We need to give the proper
permissions to this folder.
RIGHT click on the sessions folder and scroll down to properties. Click
the SECURITY tab, highlight the Internet Guest Account (anything after
that doesn’t matter, mine says server2, yours will say something else)
and put a check mark in both READ and WRITE boxes. (SEE SCREENSHOT
BELOW)
 |
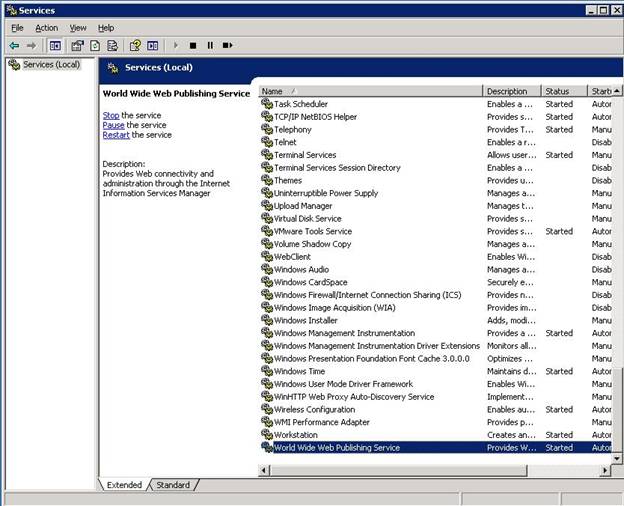
RESTARTING IIS:
We need to restart IIS services to get our website going properly.
START>PROGRAMS>ADMINISTRATIVE TOOLS>SERVICES
Scroll down to the bottom and highlight / select “World Wide Web
Publishing Service” , look at the left hand column and go to RESTART and
click it. It should take a few moments and then IIS is restarted.
 |
STEP #3
How to install Joomla:
I have multiple websites on my server, but this applies to all website
folders (See setting up Host Headers in IIS).
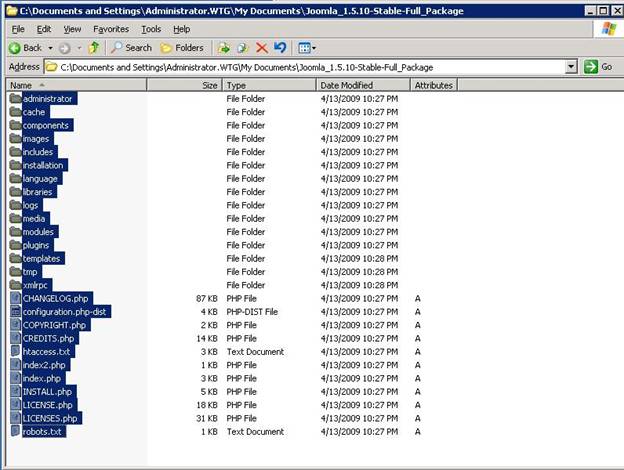
1. Download and unzip Joomla to a folder for safe keeping, in my case
it’s a clean template
2. Copy ALL the contents from the downloaded Joomla folder into your
website folder, I will continue with this tutorial as if you are
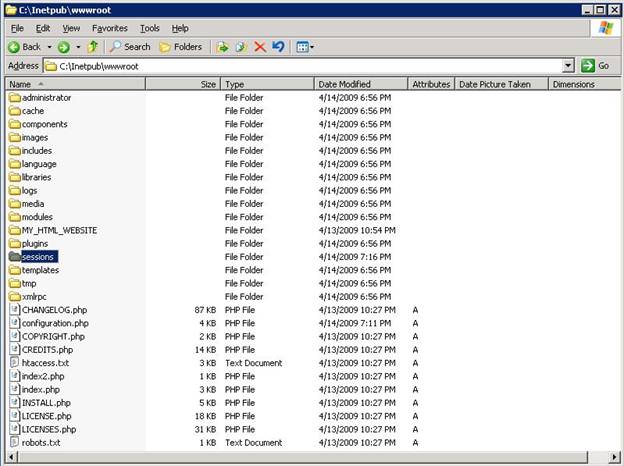
installing into the wwwroot folder. Your wwwroot folder should look very
close to mine. (See screenshot below)
 |
JOOMLA INSTALLER WEBPAGE:
We will now open a web browser and go to http://localhost and that will
open the Joomla installer webpage.
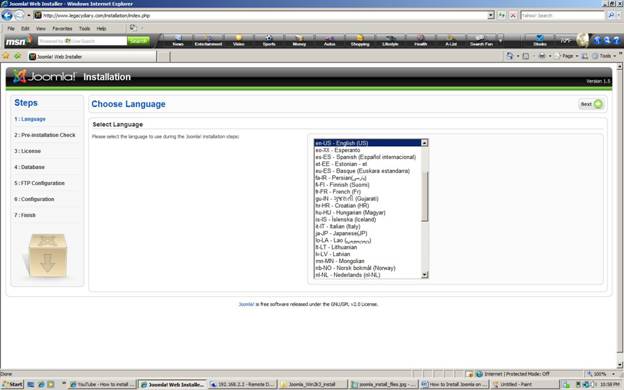
1.Click next to select English
 |
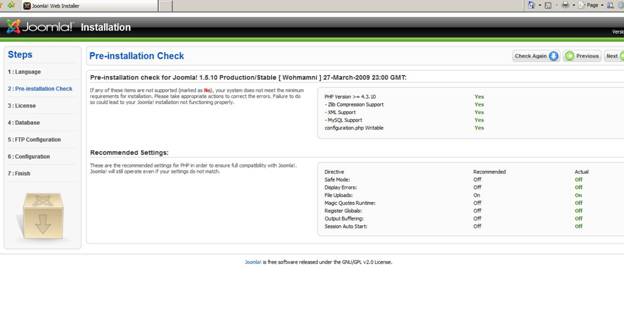
2. If all looks go on the Prerequisites than click next
 |
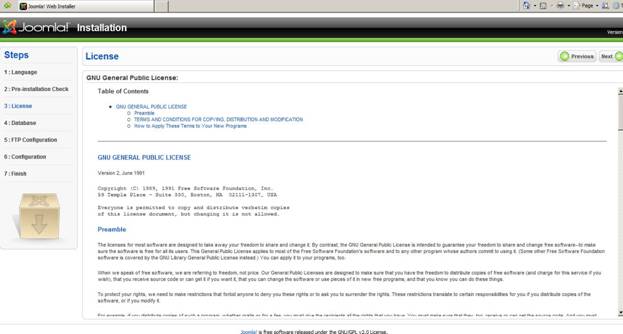
3. Click next through the License
 |
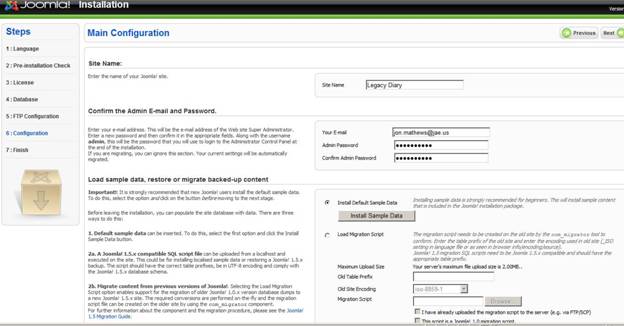
4. Now you come to the Database setup.
 |
Database Type: MySql
Host Name: localhost
Username: root
Password: the password you created when you created the MySql server
install
Database Name: you can name the database whatever you like, the database
will be created from here in Joomla to MySql
Click next when done with the database setup.
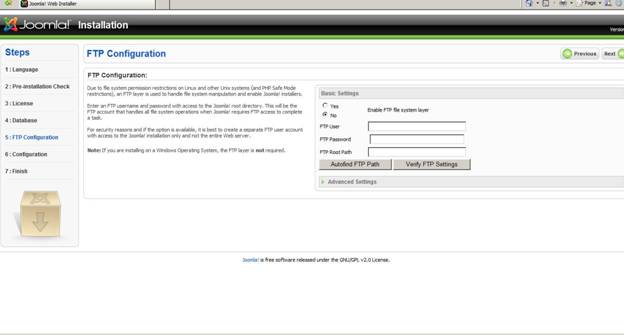
I skip or click next in the FTP setup because it’s not needed in Windows
 |
|
|
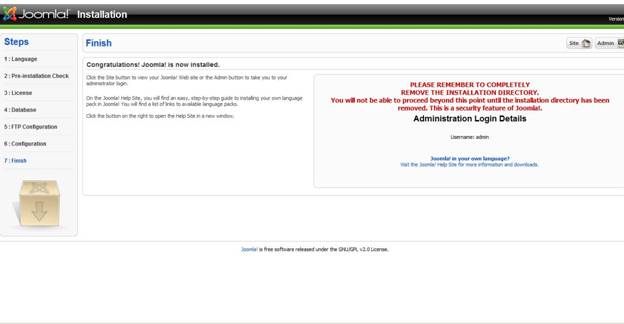 |
If you see this message, just delete the installation directory
and then click the SITE button on top to see the site.
Hooray, now you have your Joomla Website all setup.